An IRONMAN 70.3 is the first step towards the world of long-distance triathlon. With its 1.9km swim, 90km bike and 21.1km run it’s an event that will cause any rational non-triathlete to think you’re slightly crazy.
Even the thought of practising these distances separately in training can seem like a big deal. For this reason, it’s a race that requires serious thought and preparation. So in this month’s blog, I wanted to talk about some of the essential things you’ll need to consider in the lead up to IRONMAN 70.3 race day.
Let’s focus on six things that could either save your race or make you faster.
1. Simple Hydration
Seeing as you’ll be riding your bike for several hours it’s vital that you can take a drink easily. If a bottle is hard to reach, you’re less likely to use it. Fact.
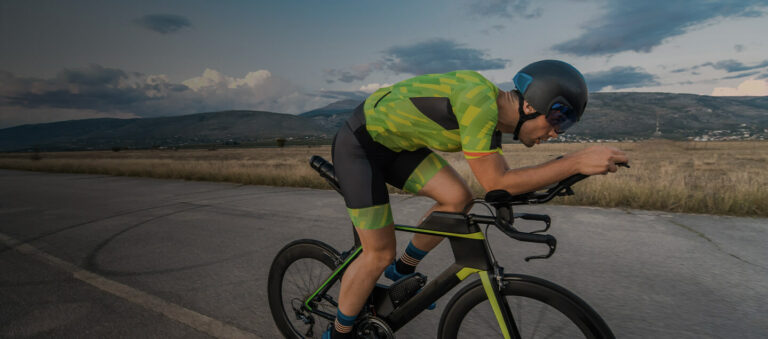
Aside from convenience, it’s also worth considering aerodynamics. Standard bike bottles placed in bottle cages on the frame add to your overall drag. Research by Cervelo has shown that a bottle placed in a cage on your down-tube results in a 4-watt drag penalty. Whereas a bottle mounted between your forearms (on your tri-bars) or behind your seat creates negligible drag.
Another option is to use a refillable bottle with a straw, which can be mounted on your frame or between your arms. These are aerofoil shaped to help reduce drag and offer a good combination of practicality and aerodynamics. Examples include the Profile Design Aero HC and the Nathan Sports AP Pro.
2. Swim Volume
When you step up from a Sprint or Olympic distance to an IRONMAN 70.3, the relative ratios of each discipline change. For example, the bike and run are over double the length of an Olympic distance, while the swim is only 400 metres longer. So an IRONMAN 70.3 is significantly less swim-dependent than an Olympic or Sprint distance triathlon.
To illustrate this point, the overall winner of IRONMAN 70.3 UK in 2015 came 95th in the swim phase, over five minutes behind the leaders. And yet he was still able to catch and pass everyone during the bike and run sections. This almost never happens in an Olympic distance race.
In terms of training, this means that some of your run and bike workouts will need to increase in length significantly. Whereas you can continue to swim-train in a similar way as you might for an Olympic distance triathlon.
3. Comfort
The bike section of an IRONMAN 70.3 lasts anything between two hours 30 and four hours, most of which you’ll spend perched on the end of your saddle. Not surprisingly, bottom discomfort can be a real issue.
Nagging saddle soreness is a form of fatigue – a pain in the rear end that’ll sap your morale and make you want to quit. Thankfully over the last few years, saddle designs have evolved to benefit the backsides of long-distance triathletes.
Split-saddles such as those by ISM and Cobb are now common at long-distance triathlons. They are designed to spread the load and reduce the pressure on the sensitive areas of your under-carriage. They are often slightly heavier than standard racing-bike saddles but they make up it by allowing you to maintain a comfortable aero position for longer.
Some bike-fitting studios even let you try various saddles while they measure the pressure points as you ride, so that you can find the right model for your unique shape. You could Google the term “bike saddle pressure mapping” to see if this is available near you.
4. Pace Judgement
Perhaps the biggest difference between racing an IRONMAN 70.3 and a shorter triathlon is the importance of pacing on the bike. Get this slightly wrong and your run split will suffer big-time. You could even end up walking the run section due to muscle soreness or cramping.
A power meter can really help you here because it tells you exactly how hard you’re pedalling versus what you’re capable of in training.
Check our Triathlon Race Pace Calculator to help guide your pacing strategy and for more information read my blog about IRONMAN 70.3 pacing.
To make life easy you can estimate your FTP by doing a 20-minute maximal cycle time trial, recording your average power and then multiplying the outcome by 95%. If you don’t have a power meter you should consider investing in a Stages or Garmin Vector S. They aren’t too expensive and you can switch them between your training and race bikes.
5. Race Suit
In a relatively long race such as an IRONMAN 70.3, your choice of clothing takes on greater significance. After all, anyone can cope with rubbing or discomfort for 90-minutes but having it for five hours requires a different level of suffering.
The first consideration is whether to have separate bike and running gear or just one outfit for the whole thing. If you’re more worried about comfort than time, you should use two outfits. If you’re chasing a time-goal you should race in one suit, so you don’t lose 10 minutes in transition while you change clothing.
Wind tunnel research has shown that a one-piece skinsuit with short sleeves can save you 5 watts in an IRONMAN 70.3 versus a sleeveless suit. And another 5 watts versus a two-piece tri suit.
Whatever you go for, I recommend finding a suit that has thin but dense padding for your bottom and handy pockets for carrying gels. Just make sure you train in it first, so you’re confident that it’s comfy enough. And apply plenty of lube such as Vaseline or BodyGlide to all your moving body parts.
- Motivational workouts
- World's best training app
- Simple video guidance
- Email coach support (rated 4.9/5)
6. Planning For The Worst
If you puncture during an Ironman 70.3 you could end up stranded 20-miles away from the transition area. I know, because I have experienced this! You’ll also lose precious time while you attempt to fix it. So it’s well worth planning for the worst-case scenario because it does happen.
Rule one is to use relatively new tyres, as these are always less likely to puncture. Rule two is to use tyres with an optimal blend of puncture protection and low rolling resistance. Check out this website that shows the latest research on rolling resistance and puncture proofing.
Rule three is to use a puncture protection sealant, such as CaffeLatex or Stans NoTubes. These foamy products are designed to fill small punctures as you ride. They don’t work 100% of the time but they’re still better than nothing. They work better if you have tubeless clincher tyres.
Rule four is to carry two CO2 quick-fill canisters and a Presta adaptor for speedy inflations. They will save several minutes versus using a pump and they’ll get your tyres nice and hard. Just make sure you practice using them first.
Rule five is to inflate your tyres properly in the first place. Read the guidelines on your tyre walls but normally you should aim for 100-120 PSI. If your tyres are too soft you’re more likely to get pinch punctures.
And finally, rule six is to carry a spare inner tube and tyre levers. Or if you use tubular tyres you could carry a spare tyre – or just rely on rules one to five instead.
Fingers crossed it doesn’t come to this!

Phil Mosley (Coach & Founder)
Phil is a recognised endurance expert who founded MyProCoach in 2010 to offer smart training plans that still leave quality time for your family, friends & career - complete with highly-rated coach support (he has sold over 40,000 so far). Learn more here!
